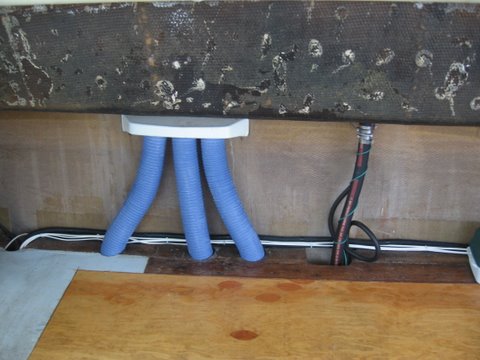
Fuel tank replacement pictures Click Here
After a few months on the hard, as we were toiling away on our preparations for the new engine I began to notice some pooling of diesel fuel in the bilge. At first I chalked it up to some spills here and there when I disassembled, and disconnected the old Perkins. However, after a while it began to become apparent, the pool was renewing itself each time I cleaned it up. After some long hard searching I found a tiny trickle coming from the outer hull and working its way down.
First reaction was that I needed this like an empty beer can given all we were up against. But, the more we reflected on it the more the realization came that the tanks were just about 30 years old and if there was ever a time to pull them this was it. There are very few things worse on a boat than a leaky fuel tank.
So, we have declared this a Documented Case of Devine Intervention!! If the leak was never found we would have had a brand new motor this summer all ready to go, but leaky tanks and diesel in the bilge.
The Old Tanks
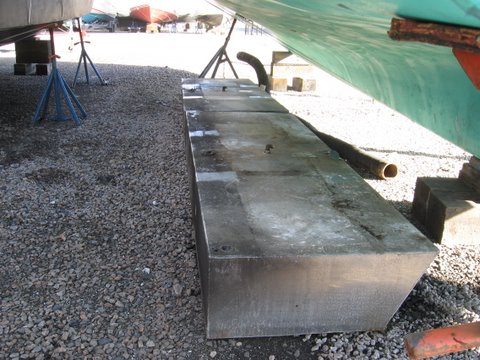
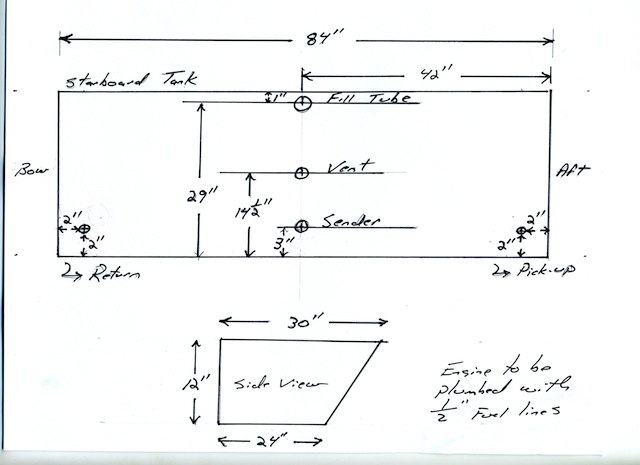
Fuel Tank Measurements
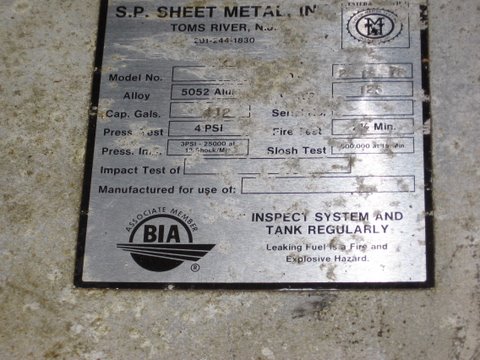
Old Tank Birth Certificate 2-14-78
We bought the tanks from Luthers Welding in Bristol, RI; http://www.lutherswelding.com/
The cost for the tanks was $2,304.19 which included delivery.
To see the referenced fuel tank replacement pictures Click Here
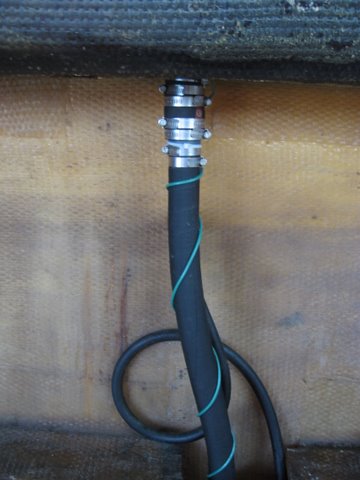
Tip!; If you ever do replace your tanks, make sure your extremely clear on the sizes for everything. On the tanks I bought all was fine except for the one item I just didn't think to mention; the fill hole. The old tank, and the fill cap on the deck were larger than the new ones. Not a huge deal, but after the expense you want it just right. Now I will have to have an adapter from the fill cap, to the hose. See picture at the end of this page.
Here are the old tanks, snug as a bug. One things for sure; when the boat was made, it was literally built around these tanks. Removal was never in the master plan.
One thing that I have continually been coming across during this project is some sort of insulation that was put down during the manufacturing process. I'm not a professional boat builder so who am I to say. But I think insualtion such as this should not be used on aluminum fuel tanks. It is NASTY stuff, black and very gooey and makes a mess every where. Here are some pictures of it. It was in a lot of places, not just the tanks.
Another thing of note is if you look at the top of the below photo, you will see some rot in the floor. There must have been a leak somewhere and water got in there over the years. It's no coincidence, thats where the fuel leak is coming from. Prolonged water contact seems to have caused the leak.
I don't know the life expectancy of aluminum fuel tanks, but these are 29 years old. Heres the birth certificate; born 2-14-78 in Tom's River, NJ.
On the starboard side we decided to leave some flooring under the lower helm station. This way we did not have to disconnect all the wiring and steering hoses. In hindsight I wish we had done the other side just like this one, because on this side the cut is exactly 8 feet long; the length of the new piece thats going in. On the other side we will need two.
Next up we lifted them out of the boat. With all of the fuel out they were reasonably light. For one of the quotes I got on the new ones they told me they weighed 175 lbs. each, but they didn't even feel that heavy. (found out later the new ones are heavier gauge than the old.) Two guys, and we got them out no problem.
Here we are, both tanks are out of the boat.
I had to pump out around 150 gallons of diesel, which my friend put into his oil heating tank in his house. Then removed the floor, then removed the stringers and disconnected all the hoses, fittings and straps.
Here they are, they actually don't look to bad, and the leak was very hard to identify. In fact, I was never able to truly find it. But, at the end of the day, a leak is a leak, and the tank was leaking.
On the installation of the tanks the maker of them, and a few other folks, recommended a method of actually gluing them down using plastic strips and 5200. I have to admit I did do this but am a little skeptical. What you do is get plastic strips 2 inches wide and not quite the width of the bottom of the tank. Then 5200 those to the tank. After that cures, put a bead of 5200 on each strip, then set the tanks in place. The point of this is that water will never be able to pool underneath the tank.
I forgot my camera the day we did this, but you can see here the strips underneath the tanks.
Addendum;
If you remove your fuel tanks there's one last job left; getting rid of them. Scrap yards will take them but only if you cut them in half. I think its just the easiest way for them to be sure there is no fuel in them. I cut mine in half using a reciprocating saw with a metal blade. All in all not to bad of a job, just have extra blades.
After they were cut in half I stacked them next to the boat, and eventually the club prodded me to get rid of them. I called a scrap yard, and the very morning I was going to pile them into my van 3 of the pieces "grew legs" during the night and disappeared. Next day, the last piece grew legs as well. Not sure it was him but I have seen a guy around quite a bit, collecting beer cans, got to be thousands of those in the tanks. The tanks weigh about 125 lbs. each so probably some good change there to be had sold as scrap.
Moral of the story; their probably worth money if you bring them to a scrap yard, however if you don’t feel like bothering with that, leave them out and they just might walk off on their own.
Here is a picture of adapter we had to make. Like I said not the end of the world, but totally unnecessary if I had just told them the fill hole size I wanted.
Fuel Fill Adapter
Fuel Fill Adapter
